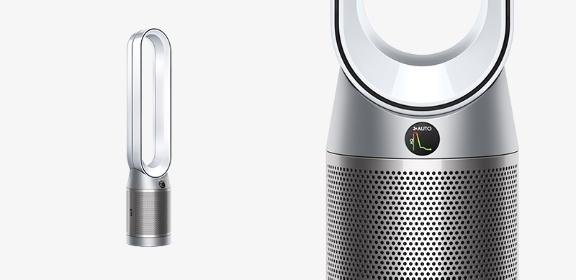
7 Easy Steps to Clean Your Dyson Filter Like a Pro
So, you’ve got your trusty Dyson vacuum by your side, churning away like a well-oiled machine.
But have you given a thought to the unsung hero of this cleaning duo – the filter? Well, let me tell you, neglecting that filter could lead to some serious suction issues.
But fear not, because in just 7 easy steps, we can show you how to clean your Dyson filter like a pro.
Stick around to discover the secrets that will keep your vacuum running smoothly and your home spick and span.
Inspection of Filter
Upon receiving your Dyson vacuum, we recommend inspecting the filter before each use to guarantee peak performance and longevity. Make sure the filter is free from visible dirt, dust, or debris that could impede suction. Check for discoloration or clogging, as these are signs that cleaning is necessary. Any tears or damage to the filter material should prompt consideration for replacement. Remember that a thorough inspection is important for maintaining top suction power and extending the life of your vacuum.
When examining the filter, be mindful of its exposure to water. If the filter becomes wet during cleaning, make sure it’s completely dry before reinstalling it into the vacuum. Moisture left in the filter can lead to mold or mildew growth, impacting both performance and hygiene. By diligently examining and caring for your filter, you can greatly enhance the efficiency and durability of your Dyson vacuum.
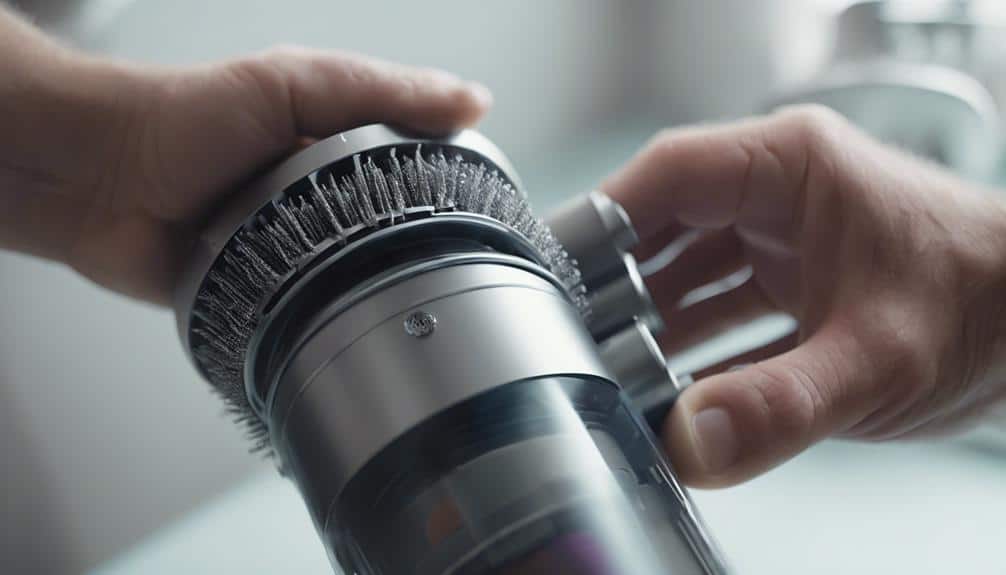
Removal of Filter
Inspecting the filter before each use guarantees peak performance, and now we’ll focus on the process of removing the filter from your Dyson vacuum. To guarantee proper removal, follow these steps:
- Lift the Pre Filter: Carefully lift the pre filter out of the cyclone assembly. This step is essential to prevent any damage to the filter unit.
- Rotate the Post Filter: Rotate the post filter anti-clockwise until the black dots align. This alignment indicates that the post filter is ready for easy removal.
- Gently Remove Both Filters: Make sure both filters are removed gently. Any rough handling could lead to damage, impacting the effectiveness of the filters.
- Prepare for Cleaning: Once both filters are successfully removed, you’re now ready to proceed with the cleaning process. Running water through the filters can help eliminate dust and debris, preparing them for peak performance.
Following these steps will facilitate the efficient removal of the filters and set the stage for thorough cleaning and maintenance of your Dyson vacuum.
Tap and Brush

When it comes to cleaning your Dyson filter, our method involves a quick tap technique to dislodge surface dust and debris efficiently.
Following this, we utilize a gentle brushing method to remove stubborn dirt and pet hair effectively.
Quick Tap Technique
To efficiently dislodge trapped debris from your Dyson filter, utilize the quick tap technique by gently tapping and brushing the filters. This method helps release dust and dirt, making the cleaning process more manageable. Here are some steps to follow:
- Tap and Shake: Lightly tap the filter to loosen the debris, then give it a gentle shake to dislodge particles.
- Brushing: Use a soft brush or cloth to brush the filter surface, removing any stubborn dirt or dust.
- Repeat if Necessary: If some particles remain, repeat the tapping and brushing process until the filter is clean.
- Outdoor Cleaning: Always tap and brush the filters outside to prevent dust from resettling inside your home.
Gentle Brushing Method
For effective cleaning of your Dyson filter, gently tapping and brushing with a soft brush is an important step in dislodging trapped dirt and debris.
To start, tap the filter to loosen surface dirt and then use the soft brush to gently sweep across the filter’s surface.
Be thorough in your brushing, ensuring all areas of the filter are covered to remove any dust or particles that could hinder its performance.
Avoid using harsh chemicals or detergents on the filter as this can damage the material.
Efficient Cleaning Process
After gently tapping and brushing the filter to dislodge surface dirt, proceed to meticulously sweep away stubborn debris using a soft brush. To make an efficient cleaning process, follow these steps:
- Tap Gently: Tap the filter lightly to remove loose debris without damaging the filter.
- Brush Carefully: Use a soft brush to sweep away any remaining dirt and particles from the filter’s surface.
- Remove Excess Water: If the filter is damp, allow it to air dry completely before reinstalling it.
- Refit the Post Filter: Once the filter is clean and dry, refit the post filter back into the Dyson unit securely.
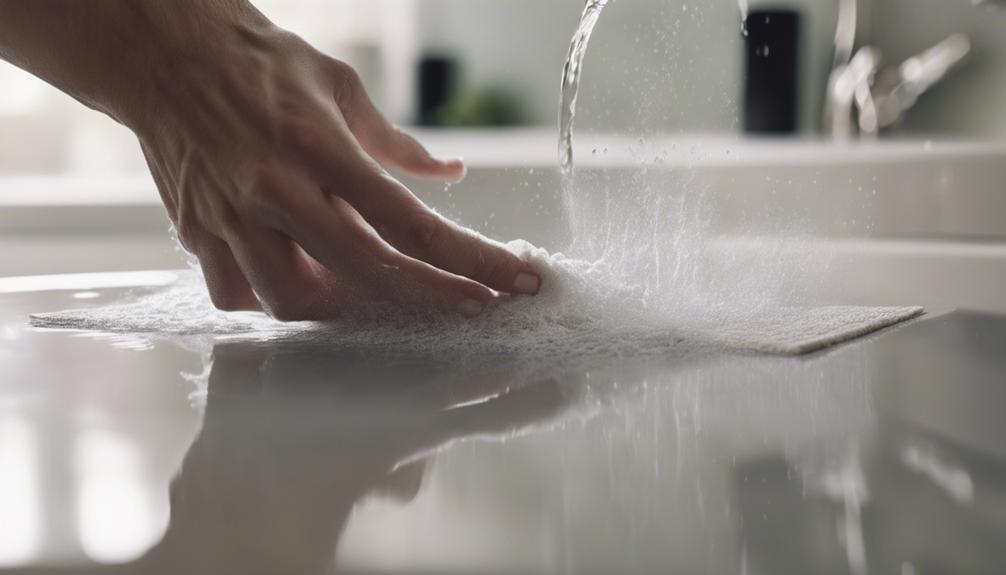
Rinse With Cold Water

Using a gentle yet thorough approach, we cleanse our Dyson filter by rinsing it meticulously with cold water. This step is essential in removing dust, dirt, and debris effectively from the filter while preserving its integrity is maintained. It is important to note that cold water is sufficient for this cleaning process as hot water can potentially damage the filter material and reduce its overall effectiveness.
When rinsing the filter with cold water, gently massage it under a stream of running water to help dislodge any trapped particles. Thoroughly rinsing the filter is key to achieving a proper cleaning and ensuring the best performance of your Dyson vacuum cleaner.
To summarize the importance of rinsing with cold water, refer to the table below:
| Benefits of Rinsing with Cold Water |
|---|
| Effectively removes dust, dirt, and debris |
| Preserves filter integrity |
| Prevents damage from hot water |
| Ensures best vacuum performance |
Drying Process
After thoroughly rinsing the Dyson filter with cold water to remove dust and debris, the next step in the cleaning process involves making sure it’s dried properly to prevent damage to the vacuum’s motor. Proper drying is essential to maintain the performance and longevity of the filters.
Here are some key steps to follow during the drying process:
- Time is Critical: Allow the filter to dry for at least 24 hours before reattaching it to the vacuum. This duration ensures that the filter is completely dry and ready for use.
- Choose a Warm Place: Place the filter in a warm area with good airflow. The warmth aids in the evaporation of moisture, while the airflow helps speed up the drying process.
- Avoid Dampness: Make sure the filter is placed in the least humid area possible. Dampness can hinder the drying process and lead to mold or mildew growth, affecting the filter’s performance.
- Check for Dryness: Before reinstalling the filter, make sure it’s completely dry to the touch. Any residual moisture can impact the vacuum’s suction power and efficiency.
Filter Reinstallation
When reattaching filters after cleaning, it’s key to make sure proper alignment and secure locking mechanisms.
The pre filter should click into place within the cyclone assembly, indicating a correct fit.
For the post filter, align the white arrow with the release icon, then rotate clockwise to lock it in place for best performance.
Proper Alignment After Cleaning
To guarantee a secure fit and prevent air leaks or reduced suction power in your Dyson vacuum, rotate the post filter anti-clockwise until the black dots align with the indicator on the machine. Improper alignment can lead to performance issues and damage.
Follow these steps for proper alignment:
- Turn the post filter anti-clockwise: Align the black dots on the post filter with the indicator on the vacuum.
- Make sure a perfect alignment: Make sure the black dots line up accurately for a secure fit.
- Prevent air leaks: Correct alignment prevents leaks that can impact suction power.
- Maintain efficiency: Properly aligning the post filter is essential for the overall efficiency of your Dyson vacuum.
Secure Locking Mechanism
For best filter reinstallation in your Dyson vacuum, guarantee a secure fit by rotating the post filter clockwise until the black dots align. Making sure the filters are securely locked in place is essential to prevent air leaks and maintain peak suction power. Before using the vacuum, always double-check that the filters are properly secured. Ensuring a secure locking mechanism is vital for the filters to function effectively in trapping dust and debris. To help you understand the importance of this step, we have provided a table below for easy reference.
| Secure Locking Mechanism Tips |
|---|
| Rotate post filter clockwise until black dots align |
| Check for secure fit before use |
| Avoid gaps or loose fitting |
| Confirm proper installation for top performance |
Test for Functionality
We recommend conducting a thorough functionality test on your Dyson vacuum post filter reinstallation to guarantee peak performance and suction power. Before testing, make sure the filters are completely dry to prevent motor damage.
Follow these steps:
- Check the alignment of the black dots on the post filter to make sure correct installation.
- Reinstall the pre-filter securely into the cyclone assembly.
- Make sure the post filter is securely attached and rotate it clockwise until it locks into position.
- Test the functionality of the vacuum by turning it on and checking for proper airflow and suction.
Final Test and Use

Checking both the pre filter and post filter are completely dry before reattaching them securely is crucial for maintaining proper airflow and suction in your Dyson vacuum. Once the filters are dry, securely reattach them to the vacuum by following the manufacturer’s instructions. Make sure to align the filters correctly and firmly press them into place to prevent any air leaks.
After reattaching the filters, it’s time to perform a final test to check the efficiency of your Dyson vacuum. Turn on the vacuum and observe if it’s functioning properly, with strong suction power and consistent airflow. Run the vacuum over different surfaces to ensure it picks up dirt and debris effectively. If everything seems to be in order, you have successfully cleaned and reinstalled the filters.
Enjoy the improved performance and cleaner air quality that come with maintaining your Dyson vacuum regularly. Remember to inspect and clean the filters periodically to prolong the life of your vacuum and keep it running smoothly.
Conclusion
After following these 7 easy steps to clean your Dyson filter, you can rest assured that your vacuum will continue to perform at its best. Regular maintenance is key to ensuring the longevity of your vacuum and maintaining peak suction power.
By inspecting, removing, tapping, rinsing, drying, re-installing, and testing your filter, you can keep your Dyson in top condition for all your cleaning needs. Follow these steps monthly for a clean filter like a pro.