7 Easy Steps to Clean Your Dyson Vacuum Efficiently
When it comes to cleaning your Dyson vacuum efficiently, it’s like starting on a maintenance journey to guarantee peak performance.
As we unravel the 7 easy steps to achieve this, you’ll discover a systematic approach that not only enhances your vacuum’s efficiency but also prolongs its lifespan.
From preparing the necessary tools to meticulously cleaning each component, every step plays a vital role in keeping your Dyson in top condition.
So, are you ready to elevate your cleaning game and elevate your Dyson’s performance?
Preparation
Before tackling the cleaning process, we need to gather essential tools and create a suitable workspace for efficiently cleaning your Dyson vacuum. Start by unplugging the Dyson vacuum and collecting necessary cleaning tools such as a microfiber cloth, scissors, and mild detergent. It’s important to make sure that the vacuum is turned off to prevent accidents during the cleaning process. Refer to the user manual for specific instructions on disassembling the Dyson vacuum for thorough cleaning.
Set up a designated cleaning area with good lighting to easily spot dirt and access all parts of the vacuum. Choose a stable surface to place the disassembled parts during cleaning to prevent any damage. Having a well-lit and organized workspace will make the cleaning process smoother and more effective. By preparing the necessary cleaning tools and establishing a suitable cleaning area, you set the stage for a successful cleaning session with your Dyson vacuum.
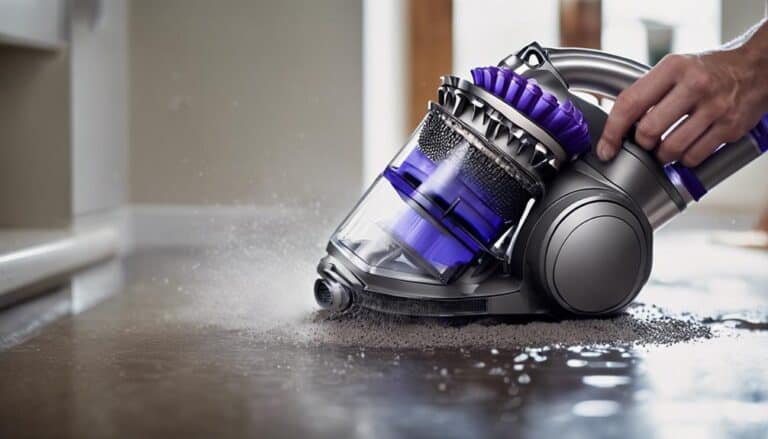
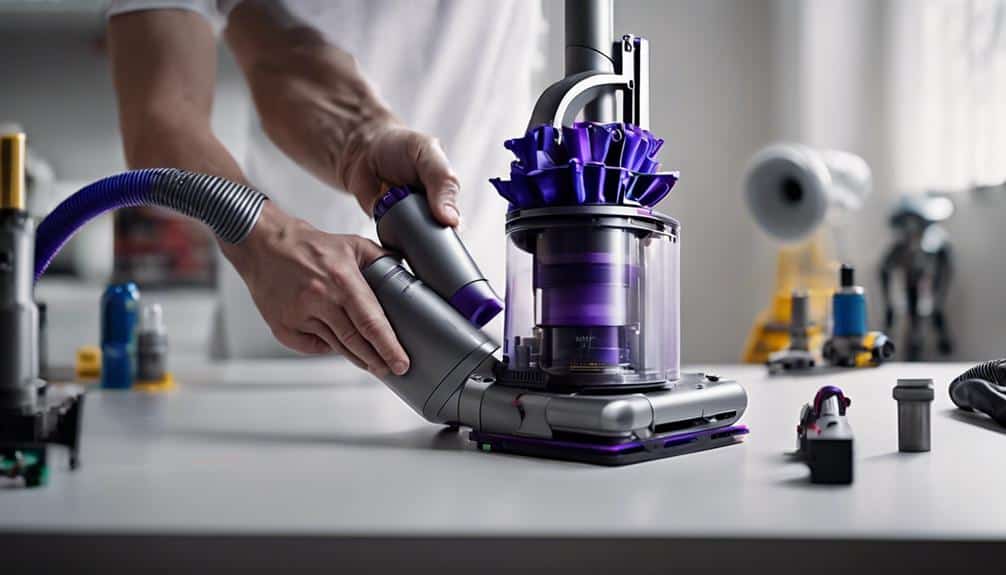
Disassembly
After preparing the necessary tools and workspace, the next step in efficiently cleaning your Dyson vacuum is disassembly. To start, unplug the vacuum and detach any attachments. A Phillips head screwdriver will be needed to remove the brush bar, allowing access to the filter compartment. Carefully release the dust canister to clean the cyclones and filter housing. It’s important to remember the positions of each part for easy reassembly later on. Once all components are disassembled, make sure they’re completely dry before reassembling the vacuum to maintain best performance.
Disassembling your Dyson vacuum is important in ensuring a thorough cleaning process. By removing the dust canister and filter, you can access hard-to-reach areas that accumulate dirt and debris. This step allows for a more effective cleaning of the cyclones and filter housing, promoting better suction power and overall performance of your Dyson vacuum. Remember to handle each part carefully and follow the reassembly instructions diligently to avoid any issues during the cleaning process.
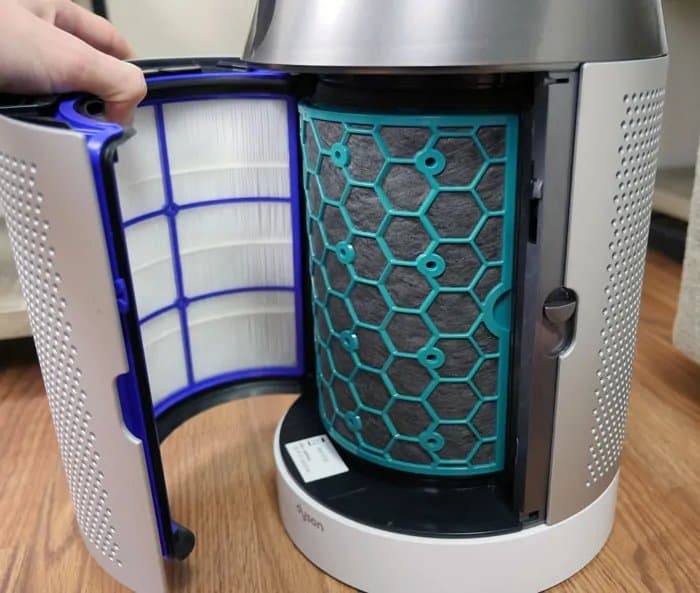
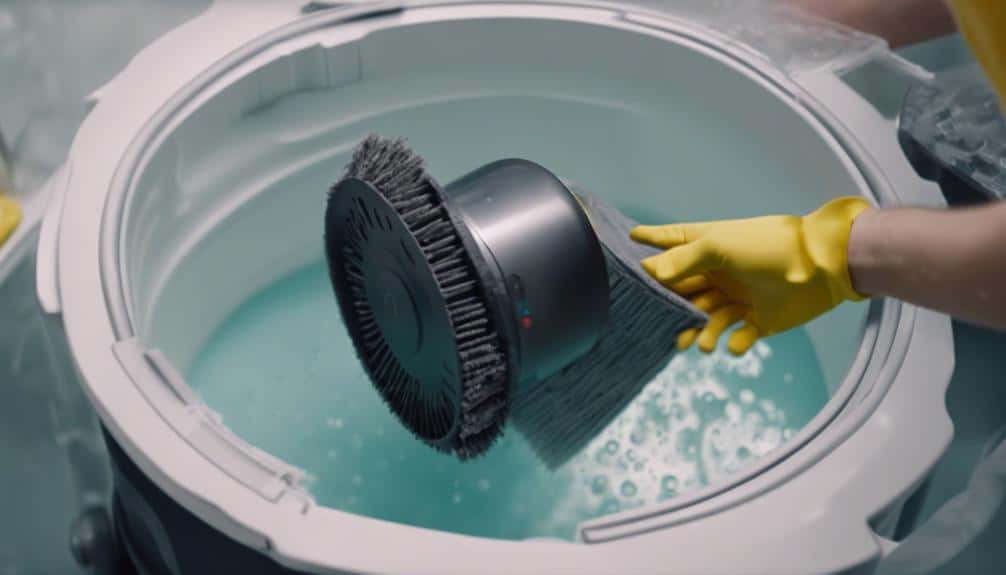
Cleaning the Filter

To effectively clean the filter of your Dyson vacuum, begin by removing it from the vacuum according to the manufacturer’s instructions. Follow these steps to guarantee a thorough cleaning process:
- Shake off Excess Debris: Before washing the filter, gently shake it to remove any loose dust or debris. This step helps prevent clogging the filter or the sink when washing.
- Rinse with Warm Tap Water: Rinse the filter under warm tap water, making sure the water flows in the opposite direction to dislodge trapped dirt effectively. Avoid using hot water as it can damage the filter.
- Air Dry Completely: After rinsing, allow the filter to air dry naturally for at least 24 hours. Placing it in direct sunlight or using heat sources to speed up the drying process can warp or damage the filter material.
Following these steps will help maintain your Dyson vacuum’s performance and guarantee cleaner air in your home. Regular filter cleaning is essential for the best suction power and longevity of your vacuum.
Clearing Blockages
Let’s start by identifying where blockages might be located within your Dyson vacuum.
Once the blockage points are identified, we can utilize appropriate cleaning tools to clear them effectively.
After clearing the blockages, it’s paramount to test the vacuum’s functionality to guarantee that all pathways are clear and the suction power is at its peak.
Identify Blockage Location
When locating blockages in your Dyson vacuum, it’s essential to check the hose, wand, brush bar, and attachments to guarantee peak performance and prevent damage.
To effectively identify blockage locations, follow these steps:
- Inspect the Hose: Check for any obstructions by running your hand along the length of the hose and visually inspecting for debris or clogs.
- Check the Wand: Detach the wand and look through it to make sure there are no blockages impeding airflow.
- Examine the Brush Bar and Attachments: Remove the brush bar and attachments, inspect them for any blockages, and clean them thoroughly to maintain peak performance.
Regularly performing these checks will help you keep your Dyson vacuum in top working condition.
Use Cleaning Tools
After locating any blockages in your Dyson vacuum, the next step is to utilize cleaning tools effectively to clear them and maintain peak suction and airflow. Use a soft brush or cloth to clear blockages in the hose and wand, making sure no dust or debris obstructs the airflow.
For tangled hairs or debris on the brush bar, scissors can be useful to maintain best performance. It’s important to avoid sharp objects that could damage the vacuum components. Regularly check and clear any blockages in the hose to guarantee proper suction.
Clearing blockages promptly not only prevents damage to the vacuum but also ensures efficient cleaning results. Remember, a clean filter and unobstructed airflow are key to keeping your Dyson vacuum working effectively.
Test Vacuum Functionality
To guarantee peak performance, thoroughly examine your Dyson vacuum for obstructions in the hoses, wand, and brush bar. Here’s how to test your vacuum for blockages:
- Inspect Hoses: Check for trapped debris or clogs that could impede suction power.
- Check Wand: Make certain the wand is clear of any blockages to maintain efficient cleaning.
- Examine Brush Bar: Remove any debris that might be affecting the brush bar’s functionality.
Blockages in these areas can lead to reduced suction power, affecting the vacuum’s efficiency. Regularly testing and clearing blockages not only ensures optimal performance but also contributes to the longevity of your Dyson vacuum.
Cleaning the Canister
Let’s start by carefully disassembling the canister following the manufacturer’s instructions to make sure we clean it thoroughly.
We should then focus on removing any debris effectively by shaking out blockages and wiping the canister clean with a damp cloth.
Remember to allow the canister to dry completely before reattaching it to the vacuum to maintain its performance.
Canister Disassembly Steps
Upon locating the release button or latch on the dust canister, proceed to detach it from the vacuum body to begin disassembling the canister efficiently.
Here are three steps to follow:
- Empty the Contents: Take the canister outside and empty the debris directly into a trash bag or bin to guarantee a thorough clean.
- Inspect for Blockages: Check the canister for any blockages or debris that could be obstructing the airflow and affecting the vacuum’s performance.
- Clean and Dry: After emptying and inspecting, use a damp cloth to wipe the canister clean. Make sure it’s completely dry before reattaching it to the vacuum body to prevent mold or mildew growth.
Removing Debris Effectively
When cleaning the canister of your Dyson vacuum, start by emptying it outside to prevent indoor dust dispersion. This step guarantees that any accumulated dust and debris are safely disposed of without causing a mess in your home.
Next, check for any blockages within the canister by shaking it out gently. Removing these blockages is essential for maintaining top suction power.
Use a damp cloth to wipe down the canister, avoiding submerging it in water or using cleaning chemicals that could damage the filter.
Regularly cleaning the canister is necessary for keeping your Dyson vacuum in top condition and ensuring efficient performance every time you use it.
Canister Drying Tips
To guarantee thorough drying of the canister, place it in a well-ventilated area for at least 24 hours after emptying it before reattaching it to the Dyson vacuum. Here are some essential tips for drying the canister effectively:
- Air Dry: Allow the canister to air dry naturally to make sure all moisture evaporates.
- Well-Ventilated Area: Position the canister in a well-ventilated space to speed up the drying process and prevent mold growth.
- Avoid Heat Sources: Don’t expose the canister to heat sources like hair dryers or direct sunlight, as it may damage the plastic and affect the Dyson vacuum’s performance.
Proper drying of the canister not only maintains the vacuum’s efficiency but also helps prevent odor buildup from trapped moisture.
Brush Bar Maintenance
Our Dyson vacuum’s brush bar requires monthly cleaning to prevent clogs and maintain peak performance. To keep our Dyson vacuum cleaner in top condition, it’s crucial to perform regular brush bar maintenance. Using scissors, carefully trim away any hair or debris that may be tangled around the brush bar. This simple step guarantees that the brush bar can rotate smoothly during operation, leading to more efficient cleaning sessions. Regular maintenance not only prevents clogs but also helps to extend the lifespan of our vacuum cleaner.
In addition to cleaning the brush bar itself, it’s important to pay attention to the brush bar housing. Dirt and debris can accumulate in this area, affecting the suction power of the vacuum. By cleaning the brush bar housing regularly, we can maintain peak performance and ensure that our Dyson vacuum operates at its best. After cleaning, always check that the brush bar spins freely to guarantee efficient and effective cleaning results.
Reassembly and Final Checks
Before proceeding with reassembly, make sure all components are thoroughly dried to prevent any potential damage to the vacuum. Following the manufacturer’s manual for proper reassembly instructions is essential to avoid assembly errors.
Here are three important steps for reassembly and final checks:
- Check Connections and Attachments: Double-check all connections and attachments to make sure they’re securely in place. Loose connections can lead to inefficiencies in the vacuum’s performance.
- Test the Vacuum: After reassembly, test the vacuum to confirm that it’s functioning correctly. This step confirms that all parts were reassembled properly and that the vacuum is in good working condition.
- Maintain Performance with Final Checks: Proper reassembly is important for maintaining the vacuum’s performance and longevity. Perform final checks to guarantee that the vacuum is ready for use and will continue to operate efficiently.
Conclusion
In conclusion, following these 7 easy steps to clean your Dyson vacuum efficiently will guarantee top performance and longevity. By properly maintaining and cleaning your vacuum, you can keep it in optimal condition and enjoy smooth operation for years to come.
Remember to regularly check for blockages, clean the filters, and maintain the brush bar to keep your Dyson vacuum working at its best. With these simple steps, your cleaning routine will be a breeze.