How to Clean Dehumidifier Filter: A Step-by-Step Guide
Maintaining a dehumidifier in proper working condition involves routine cleaning, with particular attention to the filter—a key component responsible for trapping dust, allergens, and other particles from the air. Over time, the accumulation of these particles can clog the filter, impairing the efficiency of the dehumidifier and potentially impacting the air quality in our homes. To ensure that our dehumidifier continues to function at its optimal level and to extend its lifespan, we need to clean the filter regularly using the correct methods and tools as outlined in the device’s manual.
The process of cleaning a dehumidifier’s filter isn’t complex, but it’s important to approach it with care. Before starting, we should consult our dehumidifier’s manual to understand the manufacturer’s specific recommendations for maintenance. Depending on our dehumidifier model, we may need to vacuum the filter, wash it with soapy water, or simply rinse it under running water. The manual will also provide guidance on reassembly and post-cleaning maintenance to ensure we’re reassembling the unit correctly and maintaining its efficiency.
Key Takeaways
- Regular cleaning of the dehumidifier filter is crucial for performance and air quality.
- Consult the dehumidifier’s manual for specific cleaning guidance.
- Proper reassembly and maintenance post-cleaning sustain the dehumidifier’s efficiency.
Understanding Your Dehumidifier
Before we dive into maintaining your appliance, it’s crucial to understand the types of dehumidifiers available and the key components that enable functionality. Knowing your device helps ensure proper care and maintenance.
Types of Dehumidifiers
Dehumidifiers come in various designs, each suitable for different environments and needs. Refrigerant dehumidifiers work by drawing air over cold coils, causing moisture to condense and collect into a reservoir or water tank. Desiccant dehumidifiers, on the other hand, use a moisture-absorbing material to extract water from the air, and they are particularly effective in colder conditions. Familiarizing ourselves with the manufacturer’s manual can tell us which type we own and the specific care instructions.
Components and Functionality
The primary components of a dehumidifier determine its efficiency in regulating airflow and humidity. The filter is crucial for capturing dust and allergens as air cycles through the appliance. Clean filters support optimal airflow and prevent contaminants from reaching other parts of the unit, like the coils, where moisture from the humid air is condensed.
The coils play a significant role in the moisture removal process, and their condition can affect the overall performance of the dehumidifier. Lastly, dehumidifiers typically have a reservoir or water tank to collect the water extracted from the air. Some models might also support continuous drainage through a hose. It’s important for us to regularly check and clean these components according to the manufacturer’s instructions to maintain the dehumidifier’s functionality.
Pre-Cleaning Preparation

Before we start cleaning the dehumidifier filter, it’s crucial to prepare properly. Ensuring the appliance is unplugged and we’re aware of safety precautions lays a solid foundation for a thorough and risk-free cleaning process.
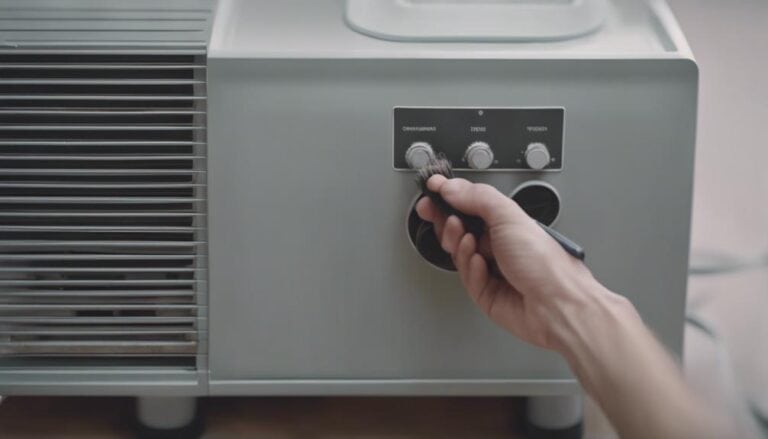
Unplugging and Disassembling
Firstly, unplug the dehumidifier. This is a non-negotiable step to guarantee our safety and protect the appliance from any electrical damage during the cleaning process. After we’ve ensured the device is unplugged, refer to the appliance’s manual to carefully disassemble necessary parts. Typically, this will involve removing the water bucket before accessing the filter. Keep all components organized to facilitate easy reassembly after cleaning.
Safety Precautions
While cleaning a dehumidifier is relatively straightforward, adhering to safety precautions is key. Always wear a mask to avoid breathing in dust and potential allergens that may have accumulated on the filter and within the machine. Ensure the area is well-ventilated. After the unit is unplugged and before starting any cleaning, inspect the dehumidifier to make sure there are no damaged elements that could compromise our safety or the appliance’s functionality.
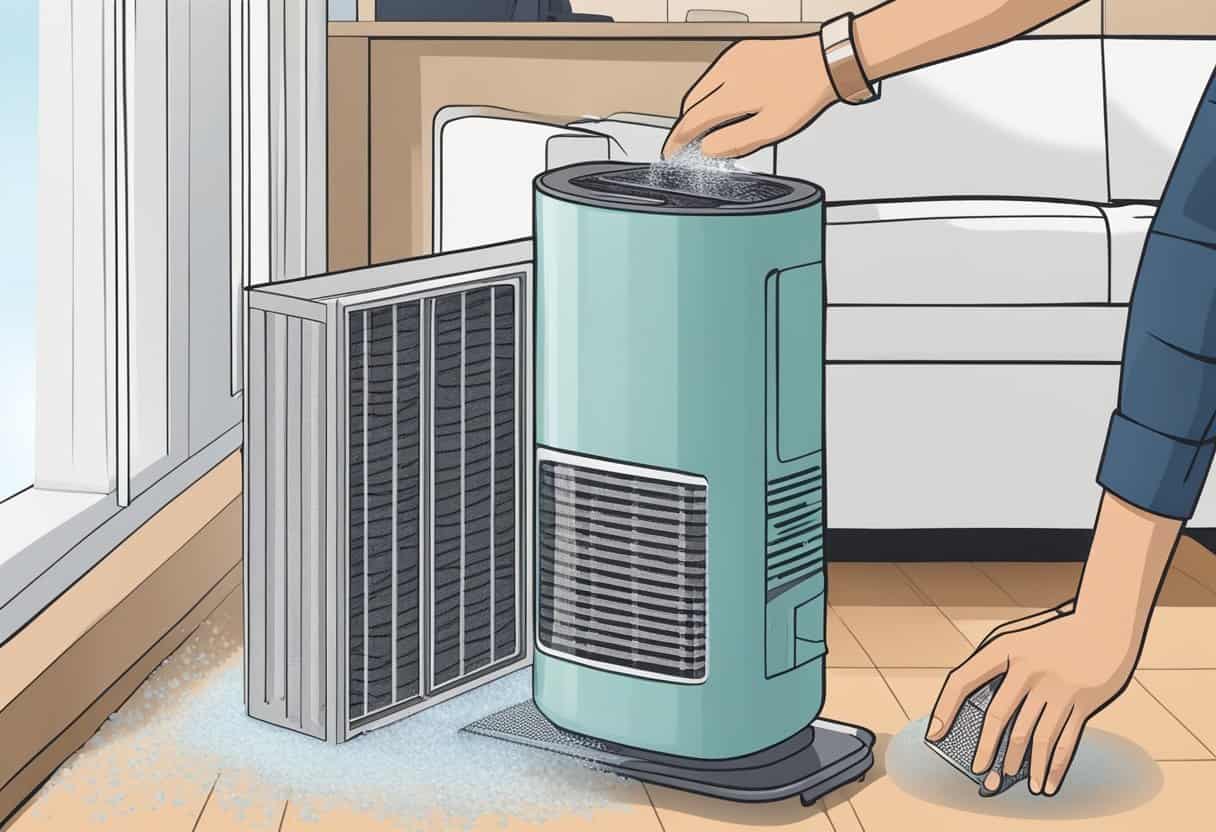
Cleaning The Filter
When we maintain our dehumidifier, keeping the filter clean is crucial for optimal performance and ensuring good air quality. Regular cleaning prevents dust, lint, and mold accumulation, which can impair the dehumidifier’s efficiency.
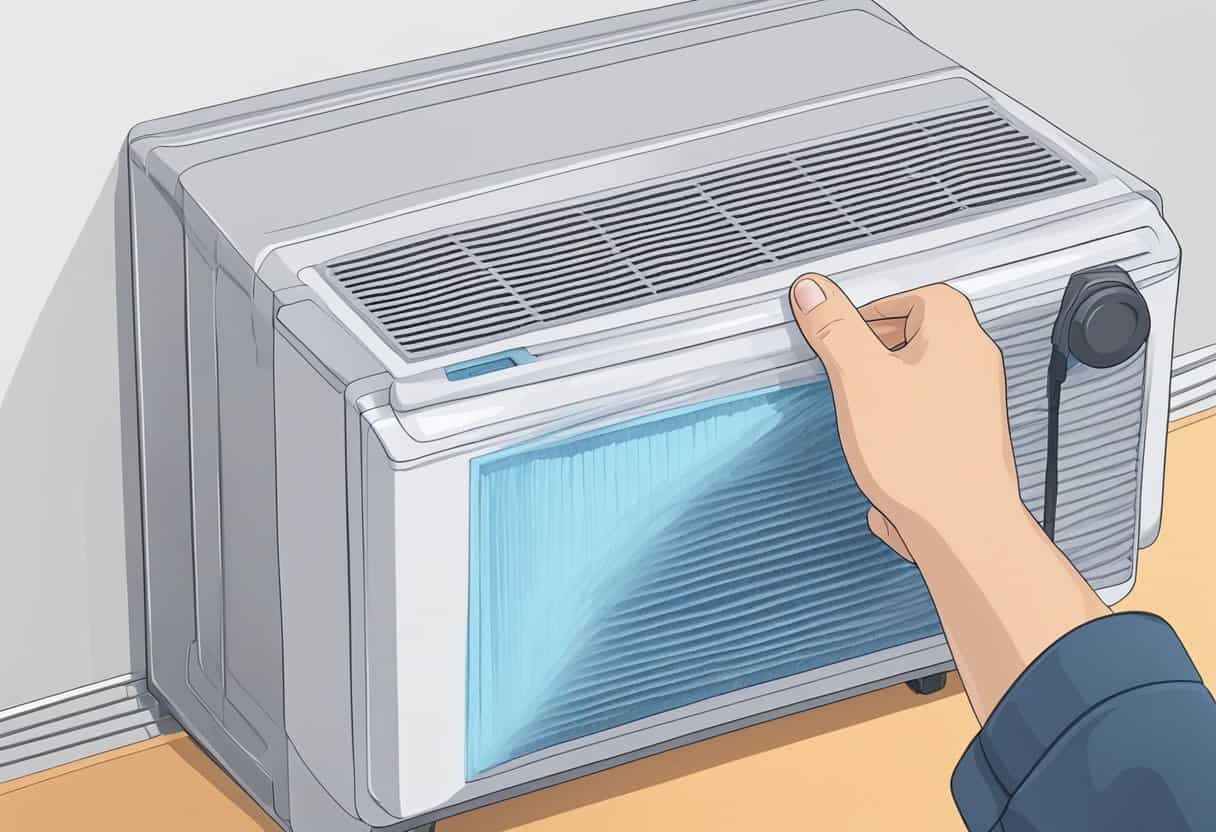
Removing the Filter
First, we need to ensure our dehumidifier is unplugged. We locate and carefully remove the filter according to the manufacturer’s instructions to avoid damaging it. It’s usually found at the back or side panel.
Vacuuming Loose Dust and Lint
Using a vacuum cleaner with an upholstery attachment, we carefully vacuum the filter to remove loose dust and lint. If a vacuum isn’t available, a soft brush can also dislodge debris effectively.
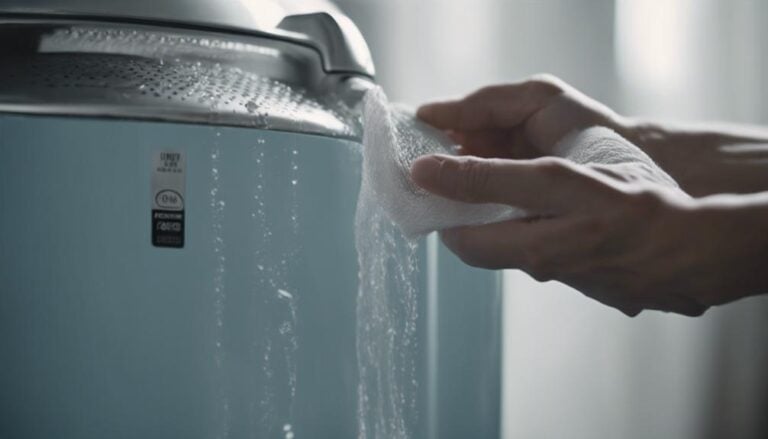
Rinsing the Filter
We then gently rinse the filter under lukewarm running water. It’s important to avoid using hot water as it can cause the filter to warp or damage. We wash the filter from both sides to ensure all dirt is removed.
Applying Cleaning Solutions
If the filter is especially dirty, we apply a mild dish soap or create a cleaning solution with vinegar. It’s essential to use gentle cleaning agents to prevent damage to the filter.
Drying the Filter
After thoroughly cleaning, we set the filter aside to dry completely. It’s best to leave the filter in a well-ventilated area or use a clean cloth to dab away excess water. We avoid using direct heat or sunlight as it can warp the filter.
Cleaning Interior Components
Before we dive into the specifics, it’s essential to understand that the interior components of a dehumidifier require regular maintenance to prevent dust buildup, mold, and bacteria. The coils and water reservoir are areas that often harbor debris and require attention to ensure the unit operates efficiently.
Coils and Water Reservoir Cleaning
The coils are crucial for the dehumidifier’s functionality and need to be free of dust and debris. To clean them:
- Turn off and unplug the dehumidifier.
- Access the coils by removing the back panel.
- Use a soft brush or a microfiber cloth to gently wipe away any dust.
- If the coils are very dirty, consider using a coil cleaner available at hardware stores.
- Spray the cleaner and wait for the recommended time before wiping it off.
The water reservoir or bucket also requires cleaning to prevent the growth of mold:
- Remove the bucket following the manufacturer’s instructions.
- Empty any remaining water.
- Clean with a solution of warm water and a small amount of dish soap or mix equal parts water and white vinegar for a natural option.
- Rinse thoroughly with clean water and dry before reinstalling.
Removing Mold and Mildew
Mold and mildew form in damp environments and can become a health hazard if not addressed.
- Inspect the dehumidifier bucket and other interior areas for signs of mold or mildew.
- To clean these areas, we can create a solution of bleach and water (1/2 cup of bleach per gallon of water) to effectively kill mold and bacteria.
- Use a cloth soaked in the solution to wipe down the affected areas.
- Leave the bleach solution on the surface for at least 10 minutes before rinsing with clean water.
- Dry all the components thoroughly before reassembling your dehumidifier.
Regularly cleaning the interior components of your dehumidifier will prolong its life and efficiency, ensuring the air in our home remains as fresh and comfortable as possible.
Cleaning the Exterior
Before we begin restoring the cleanliness of our dehumidifier, it’s crucial to tackle the exterior, where dust accumulation can impact not only the look but also the unit’s efficiency. We’ll ensure that by regularly wiping down the shell and clearing the air vents, we maintain the dehumidifier’s ability to promote optimal air quality.
Wiping Down the Shell
Firstly, we’ll remove any dust or dirt that settled on the surface. Using a dry microfiber cloth, we gently run it over the entire exterior of our dehumidifier. For persistent spots or scuff marks, moisten a corner of the cloth and apply gentle pressure to lift the dirt. It’s important to do this regularly to prevent build-up that could hinder the unit’s performance.
Clearing the Air Vents
Next, our focus shifts to the air vents, where restricted airflow can occur due to blockages. Vacuum any visible debris from the vents to maintain proper airflow. In some instances, a soft-bristled brush may also be used to dislodge accumulated dust. By keeping these vents clear, we ensure that not only is the air quality preserved but that our dehumidifier operates efficiently.
Reassembly and Post-Cleaning Maintenance
Once we’ve thoroughly cleaned the dehumidifier filter, we must focus on correct reassembly to ensure optimal performance. Adhering closely to the manufacturer’s instructions will prevent any impact on efficiency and energy use.
Putting Components Together
When reassembling, it’s important to align all components as they were before disassembly. We begin by securely fitting the air filter back into its housing, making sure that no gaps are present through which unfiltered air could pass. Following the manual, we ensure that each screw or clip is precisely in place, as improper assembly may affect the airflow and the unit’s overall effectiveness.
Testing For Proper Operation
After reassembly, testing the dehumidifier is crucial for maintaining high efficiency and energy conservation. We plug in the device, turn it on, and observe its operation for a few moments. Listening for irregular sounds can alert us to any potential issues with the components. Confirming that the unit cycles on and off properly helps us to be sure that we’ve restored it to its best working condition. If there are discrepancies in performance, we consult the manufacturer’s instructions or contact customer support for further assistance.
Routine Maintenance Tips
To ensure our dehumidifier operates effectively and stands the test of time, we adhere to a specific maintenance schedule and performance checks. Regularly cleaning the filter is crucial for optimal efficiency and extending the appliance’s lifespan.
Frequency of Cleaning
Cleaning Interval: Once a Month
We recommend checking and cleaning our dehumidifier’s air filters at least once a month. This frequency may increase if we notice the dehumidifier is used in a dusty environment or its performance seems to be diminishing. This regular maintenance is pivotal in preventing dust and dirt from impeding airflow and efficiency.
Maintaining Optimal Performance
Performance Checklist:
- Humidistat Adjustment: Ensure it’s set to appropriate levels to prevent overworking. Typically, an indoor humidity level of 35% – 50% is sufficient.
- Airflow: Confirm that vents and airways are clear from obstructions.
- Filter Replacement: If cleaning doesn’t restore the filter’s integrity, replace it to maintain efficiency.
Maintaining our dehumidifier through routine care saves us from future inconvenience and assures us of its lasting efficiency.
Common Questions and Troubleshooting
In this section, we’ll address some pressing concerns regarding dehumidifier filters, helping you to maintain optimal performance and air quality. We’ll cover the steps to take when faced with persistent issues, and how to know when it’s time to call in the professionals.
Dealing With Persistent Issues
Sometimes, despite regular maintenance, you might encounter ongoing problems with your dehumidifier. Performance can be affected by several factors such as dust buildup, mold, and bacteria which can clog filters and diminish air quality. To troubleshoot these problems, we adhere to the following checklist:
- Check for Contaminants: Visually inspect the filter for an excess of dust, mold, and other contaminants. These can often lead to poor air circulation and reduced efficiency.
- Follow Manufacturer’s Instructions: It’s crucial to clean and replace filters following the manufacturer’s guidelines. This ensures the lifespan of your dehumidifier is not compromised.
- Monitor Energy Usage: A spike in energy costs might indicate the dehumidifier is working harder to maintain the desired humidity level due to a dirty filter.
- Note the Buildup: Excessive buildup can force the dehumidifier to overwork, potentially leading to mechanical failures. If simple cleaning doesn’t resolve the issue, consider replacing the filter.
Remember, routine maintenance is a surefire way to keep performance high and costs low.
When to Seek Professional Help
While we can manage most maintenance and minor issues ourselves, certain situations necessitate professional assistance:
- Warranty Concerns: If your dehumidifier is under warranty, consult the manufacturer before undertaking any major repairs yourself.
- Unfamiliar Sounds or Smells: Odd noises or smells emanating from your dehumidifier can indicate a more serious issue that might require expert inspection.
- Consistent Performance Decline: If troubleshooting hasn’t improved the dehumidifier’s performance, professional help can prevent further damage and maintain air quality.